Up and runningin 10 minutes
Fully autonomous: no technician, no wiring, no calibration
Requirements
Counting mats


Communication gateway

Connectors
Technis app


Flat and rigid floor

Nearby power outlet

Protective cover
Outdoor platform (optional)

INDOOR INSTALLATION
5 steps to be operational
Assemble the mats directly in their final location - avoid moving them once connected.
1
Prepare the surface
Place the mats on a clean, flat and rigid surface. If the floor is not perfectly level, place a rigid underlay beneath them (ideally the Intechfloor outdoor platform).
Note: The mats also work on concrete, tiles, carpet and wood — as long as the surface is stable and flat.
2
Assemble the mats


Place mats side by side
Open the connector cover
Plug in the connectors and link each mat
Check that the LED indicates a connection
Close the cover and check the lock
3
Connect the gateway


Place the Mat-to-Gateway box on the last mat
Open the connector cover
Plug in the male connector
Connect to the communication gateway
Plug into a power outlet
4
Lay down the protective mat
Once the gateway is connected, cover the mats with a protective cover. It must:
-
Extend at least 10 cm on all sides beyond the included connector box
-
Have a uniform thickness of at least 10 mm
-
Weigh no more than 3.5 kg
-
Have a uniform height (no steps or bumps)


5
Configure via the application


Download the app (App Store / Google Play)
Log in to your account and click on Scanner
Scan the QR code on the back of the communication gateway
Choose connection type: built-in 4G (default), Ethernet or Wi-Fi
Name the device, confirm installation and access your data
OUTDOOR INSTALLATION
For an outdoor installation, specific accessories are required. Consult the full guide below or contact our team.
For optimal counting
A few simple rules guarantee maximum accuracy.

Full width coverage
The mats must cover the entire passage width of the Mat 2.0.
Fluid flow required
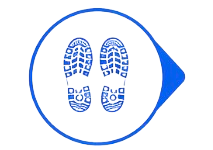
Each person must take at least one step onto the mat.

No standing still
Avoid any queuing or standing still on the mat.

Avoid interference
Do not place the mats near portals or metal detectors.

Clean and flat surface underneath
No cables or unevenness under the mats.
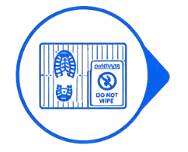
Do not walk on the edges
Avoid intense rubbing or stepping on the protective cover.
Testimonials
François D.
"Truly up and running in 10 minutes as promised! The 5 steps are clear and we didn't need any technician. We installed everything ourselves with no technical knowledge whatsoever."
Emma R.
"The configuration via the app is really intuitive. We scanned the QR code, named the device and had access to our data within minutes. No wiring, no calibration."
Côme M.
"We had a last-minute event and needed to count our attendance. We installed the Mat 2.0 in 10 minutes as advertised and it was immediately operational. A real pleasant surprise."